


An image view allows creating many types of images suitable for some common requirements.

Table of contents
Gradle
Step 1. Add this in your root build.gradle at the end of repositories:
allprojects {
    repositories {
        ...
        maven { url 'https://www.jitpack.io' }
    }
}
Step 2. Add dependency
dependencies {
    ...
    implementation 'com.github.homanad:FlexImageView:1.0.0'
}
Usage
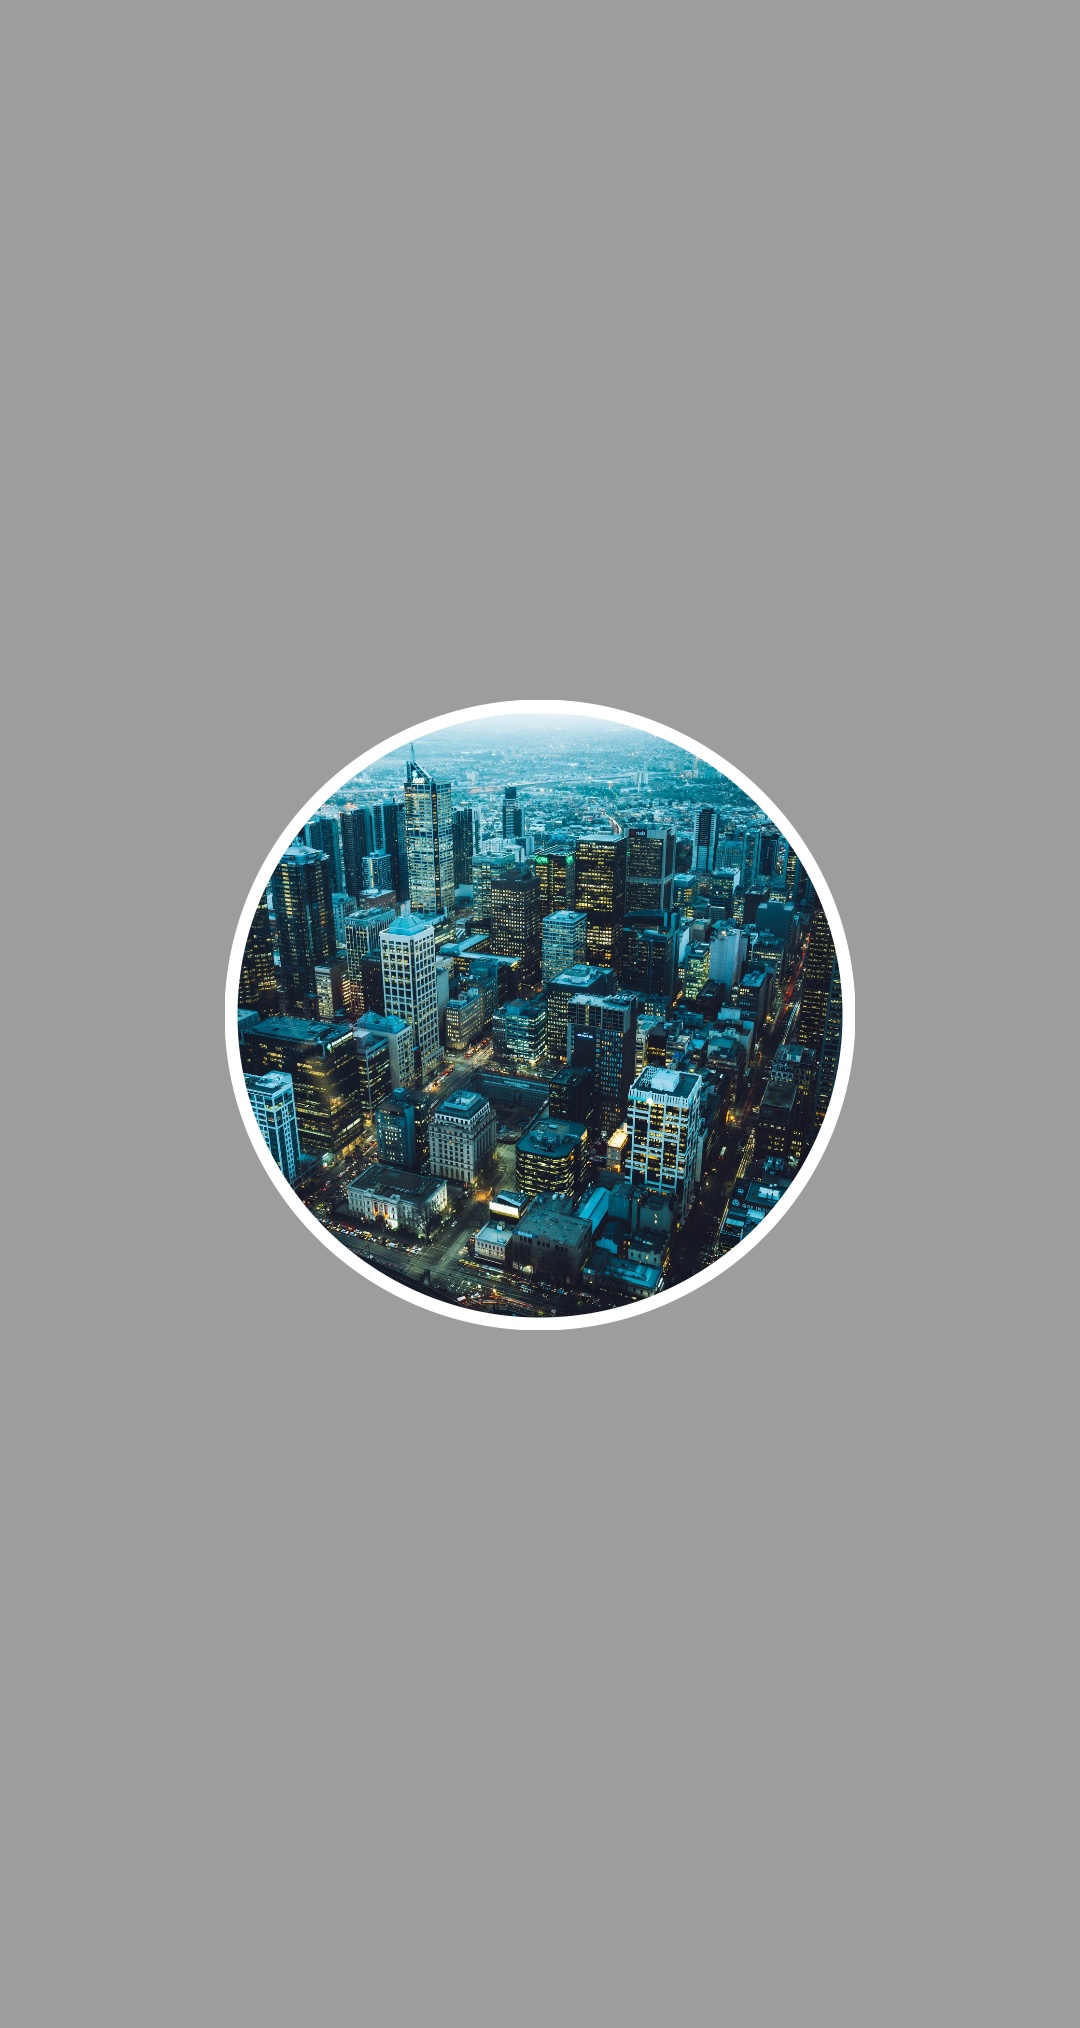
A circular image view
This is done simply by setting layout_width and layout_height to the same value, and corner_radius by half that number or greater:
<com.hmmanit.android.flexibleimageview.FlexImageView
    android:id="@+id/image_view"
    android:layout_width="200dp"
    android:layout_height="200dp"
    app:corner_radius="100dp"
    app:border_width="3dp"
    app:border_color="#FF0000"
    app:srcCompat="@drawable/image" />
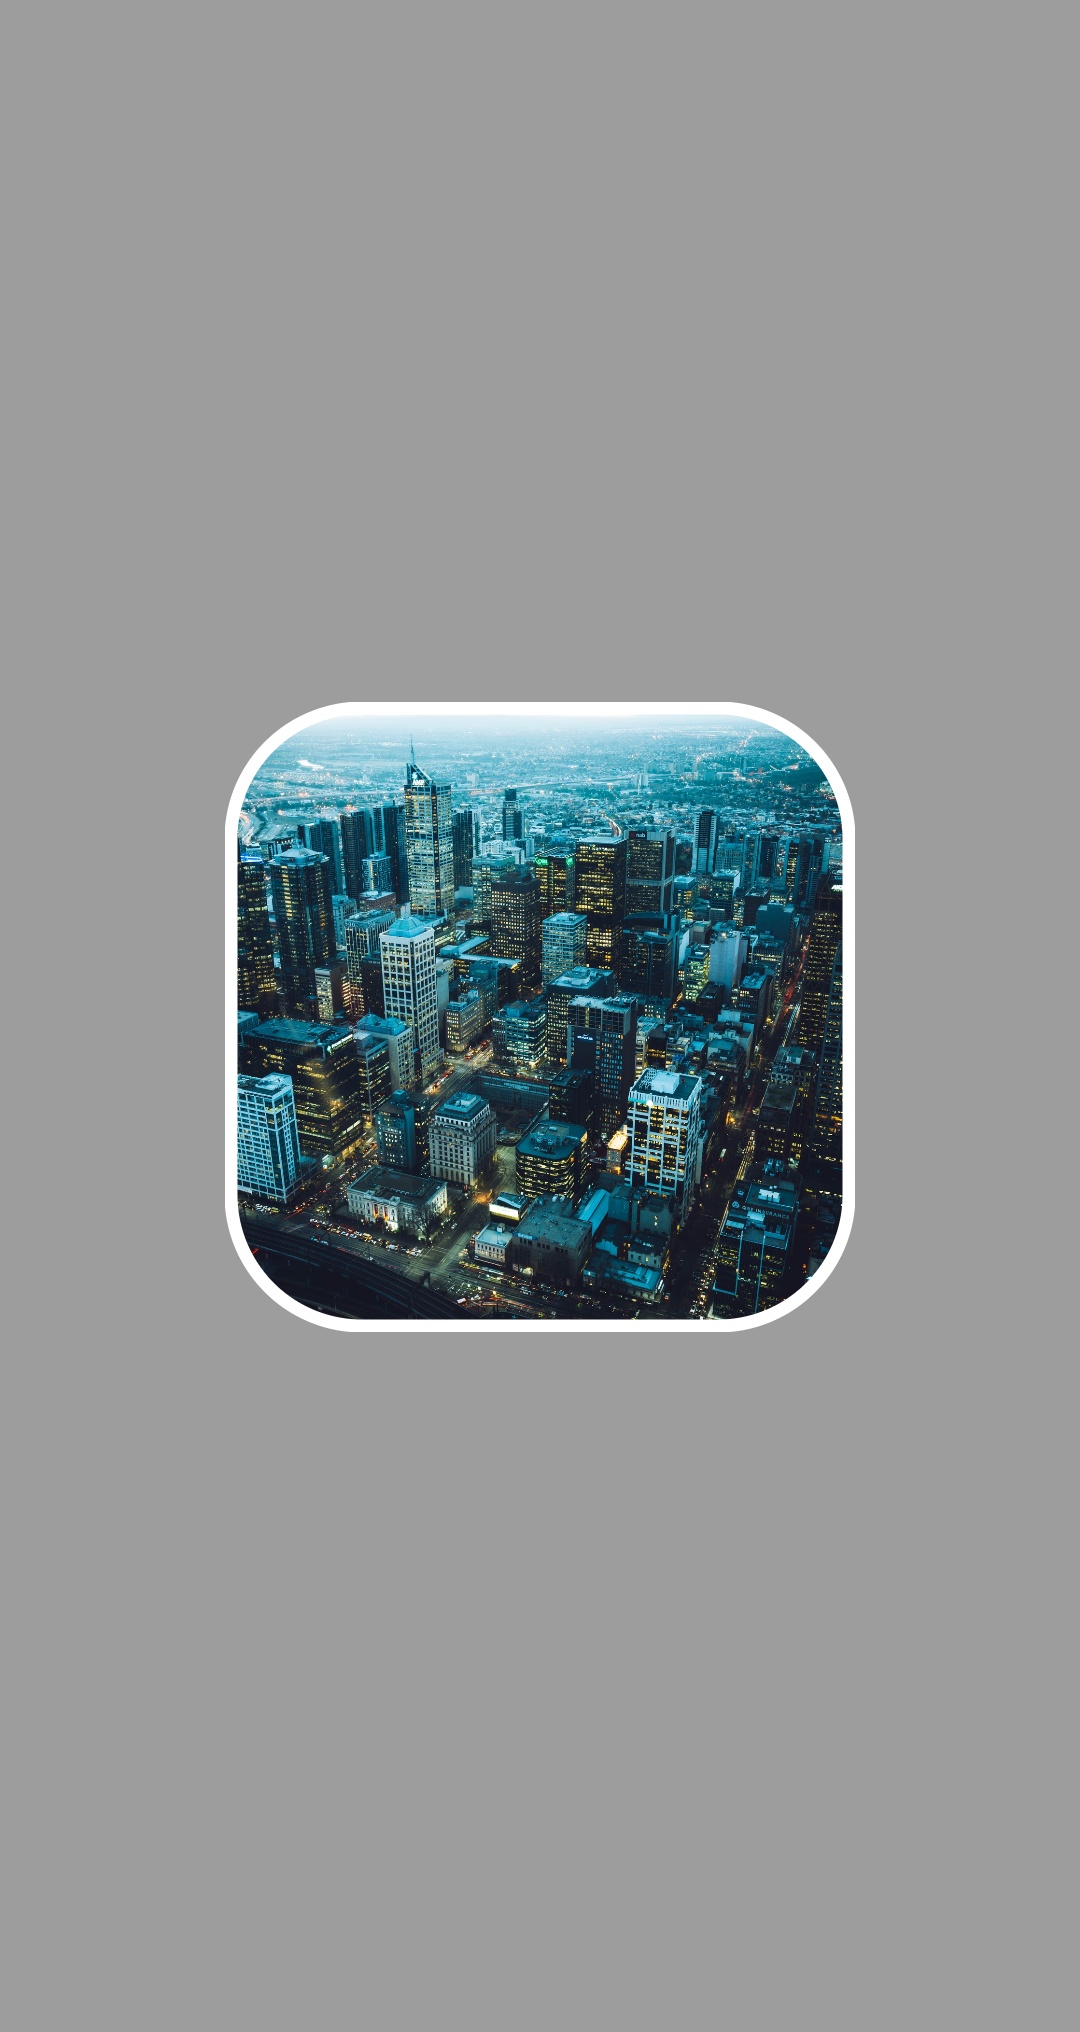
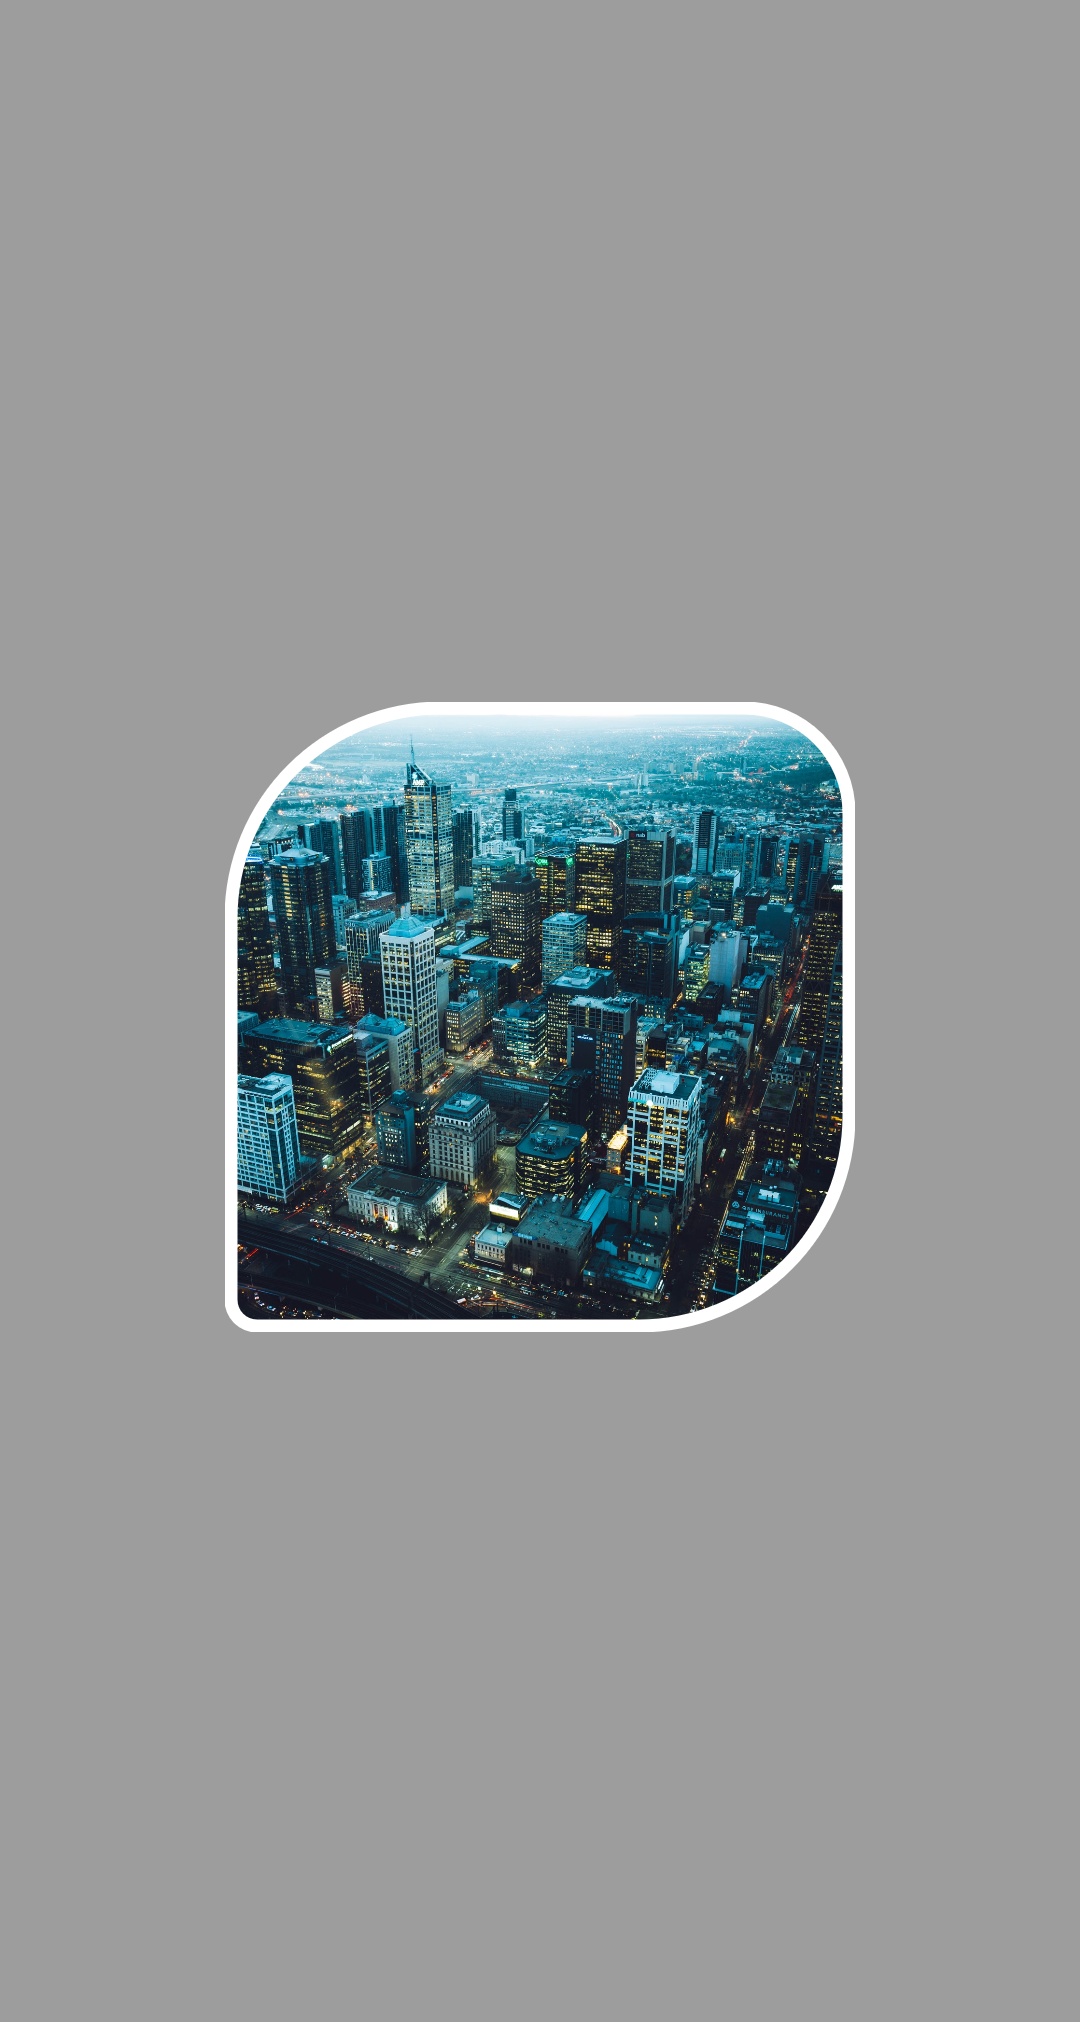
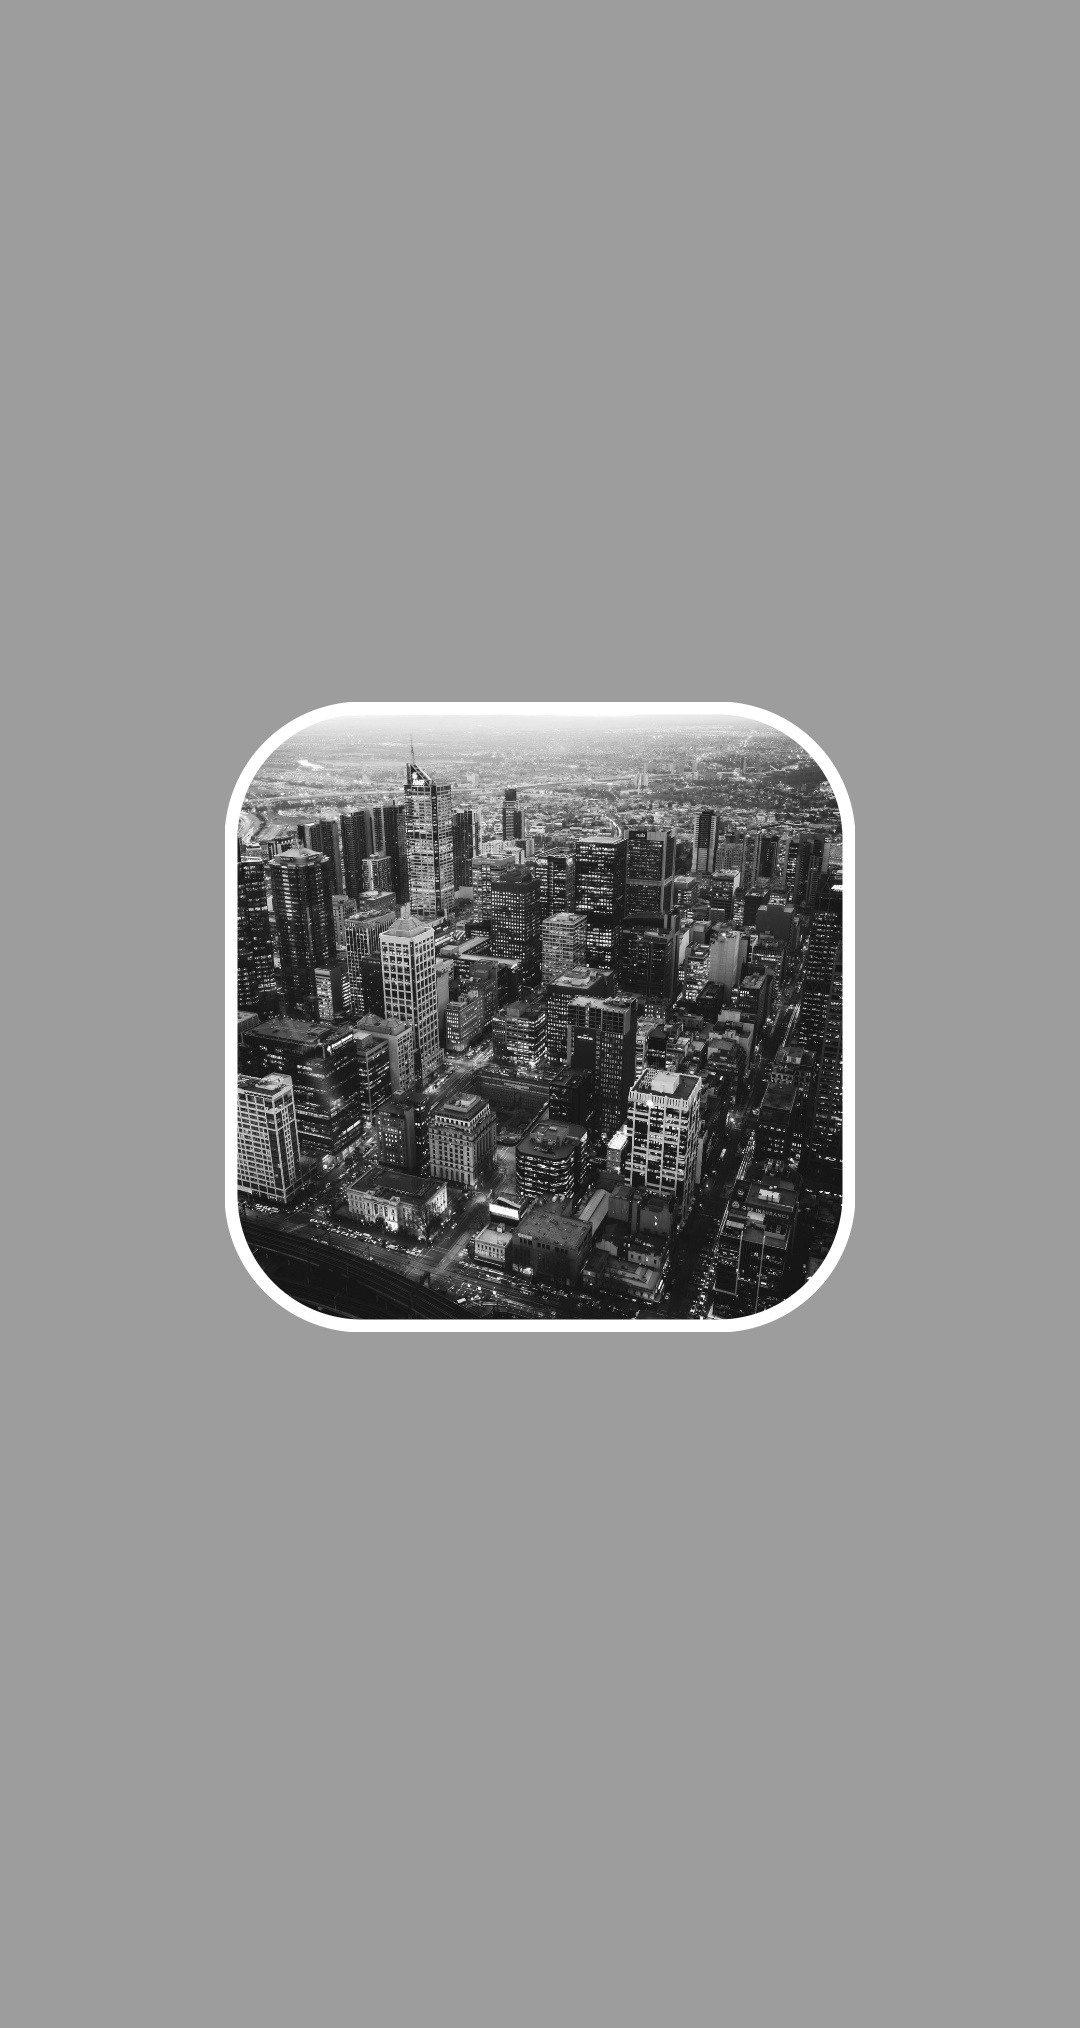
A rounded image view
Same radius for all 4 corners: A simple rounded image, this is not necessary layout_width and layout_height must be the same value (depending on your purpose of use), and the value of corner_radius will determine the radius of all 4 corners.
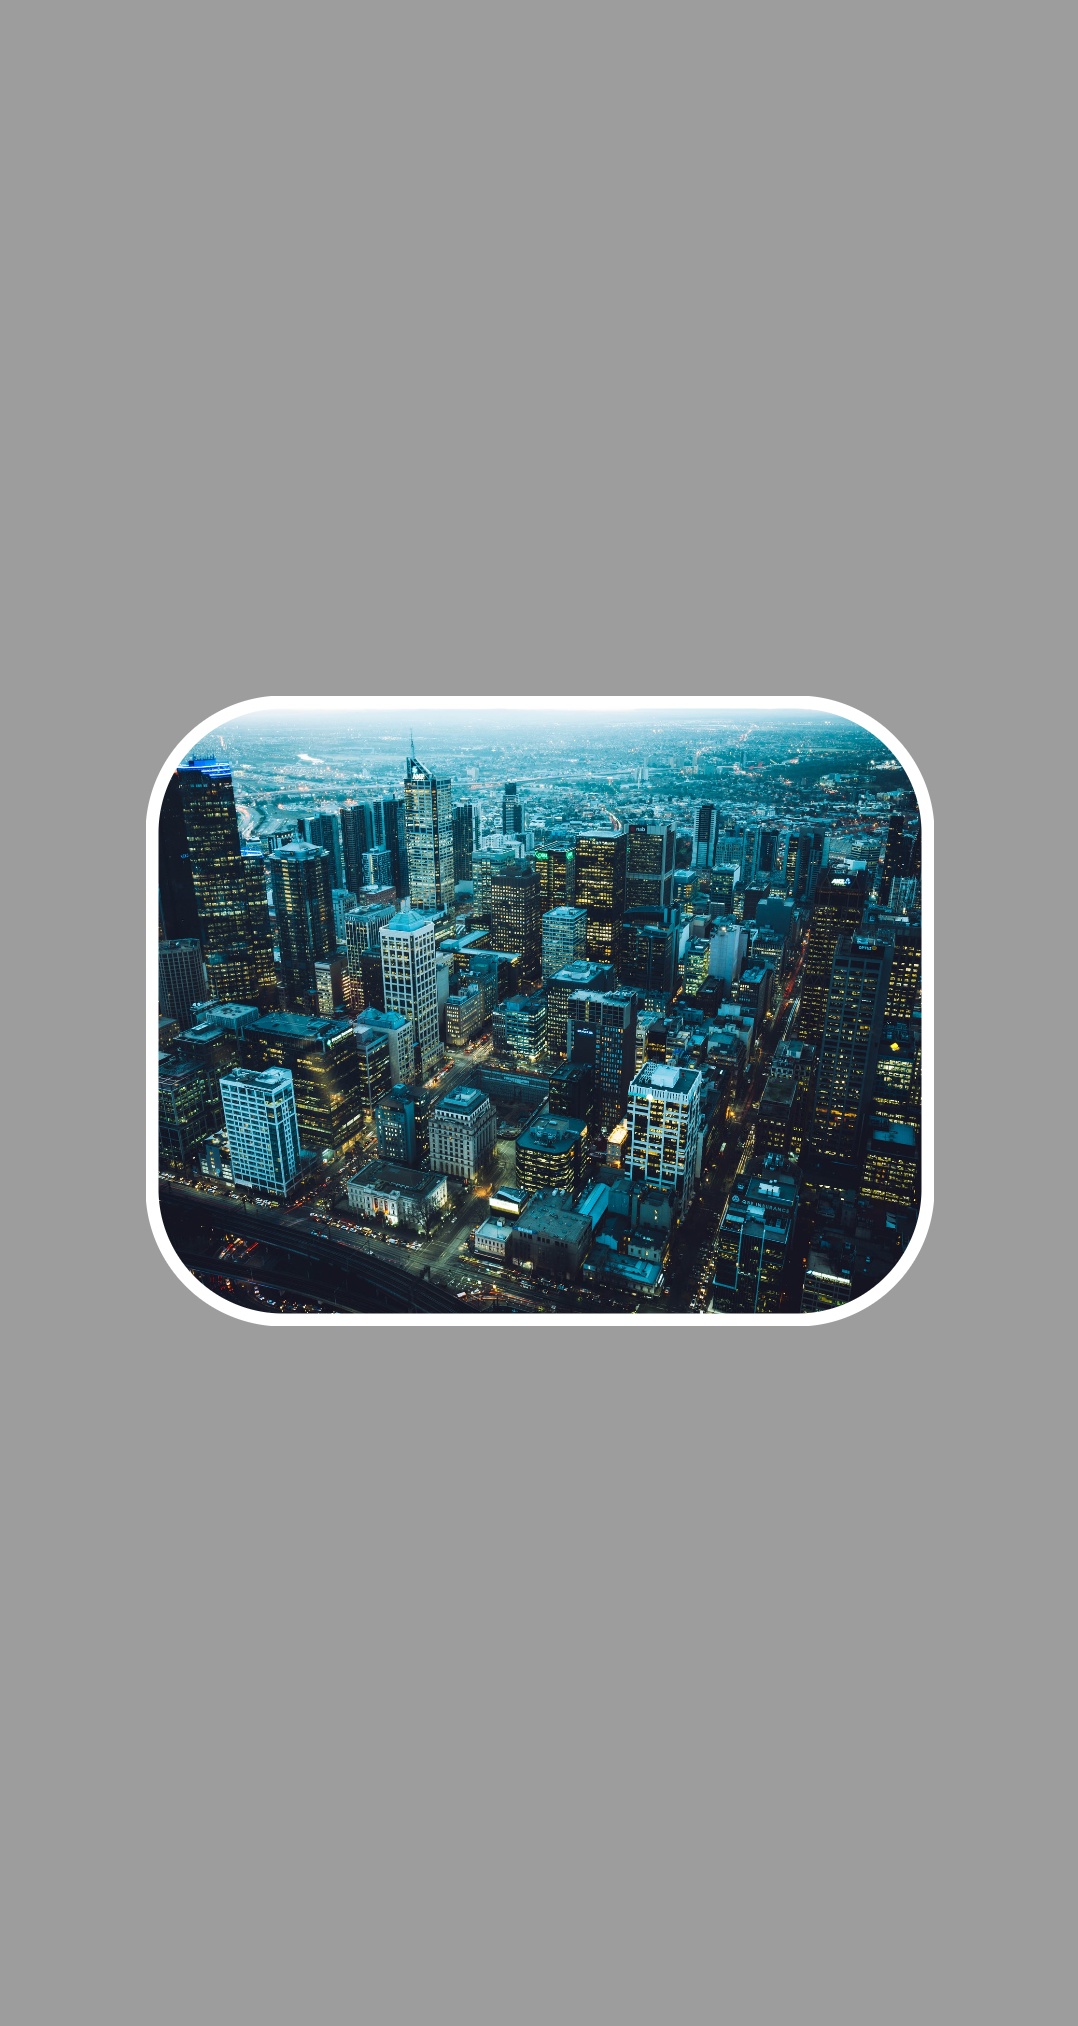
Different radius for all 4 corners: In a certain case, you want to make your image more special, unbalanced, you can think of using the following 4 attributes:
app:corner_bottomRight_radius="80dp"
app:corner_topLeft_radius="80dp"
app:corner_topRight_radius="30dp"
app:corner_bottomLeft_radius="10dp"

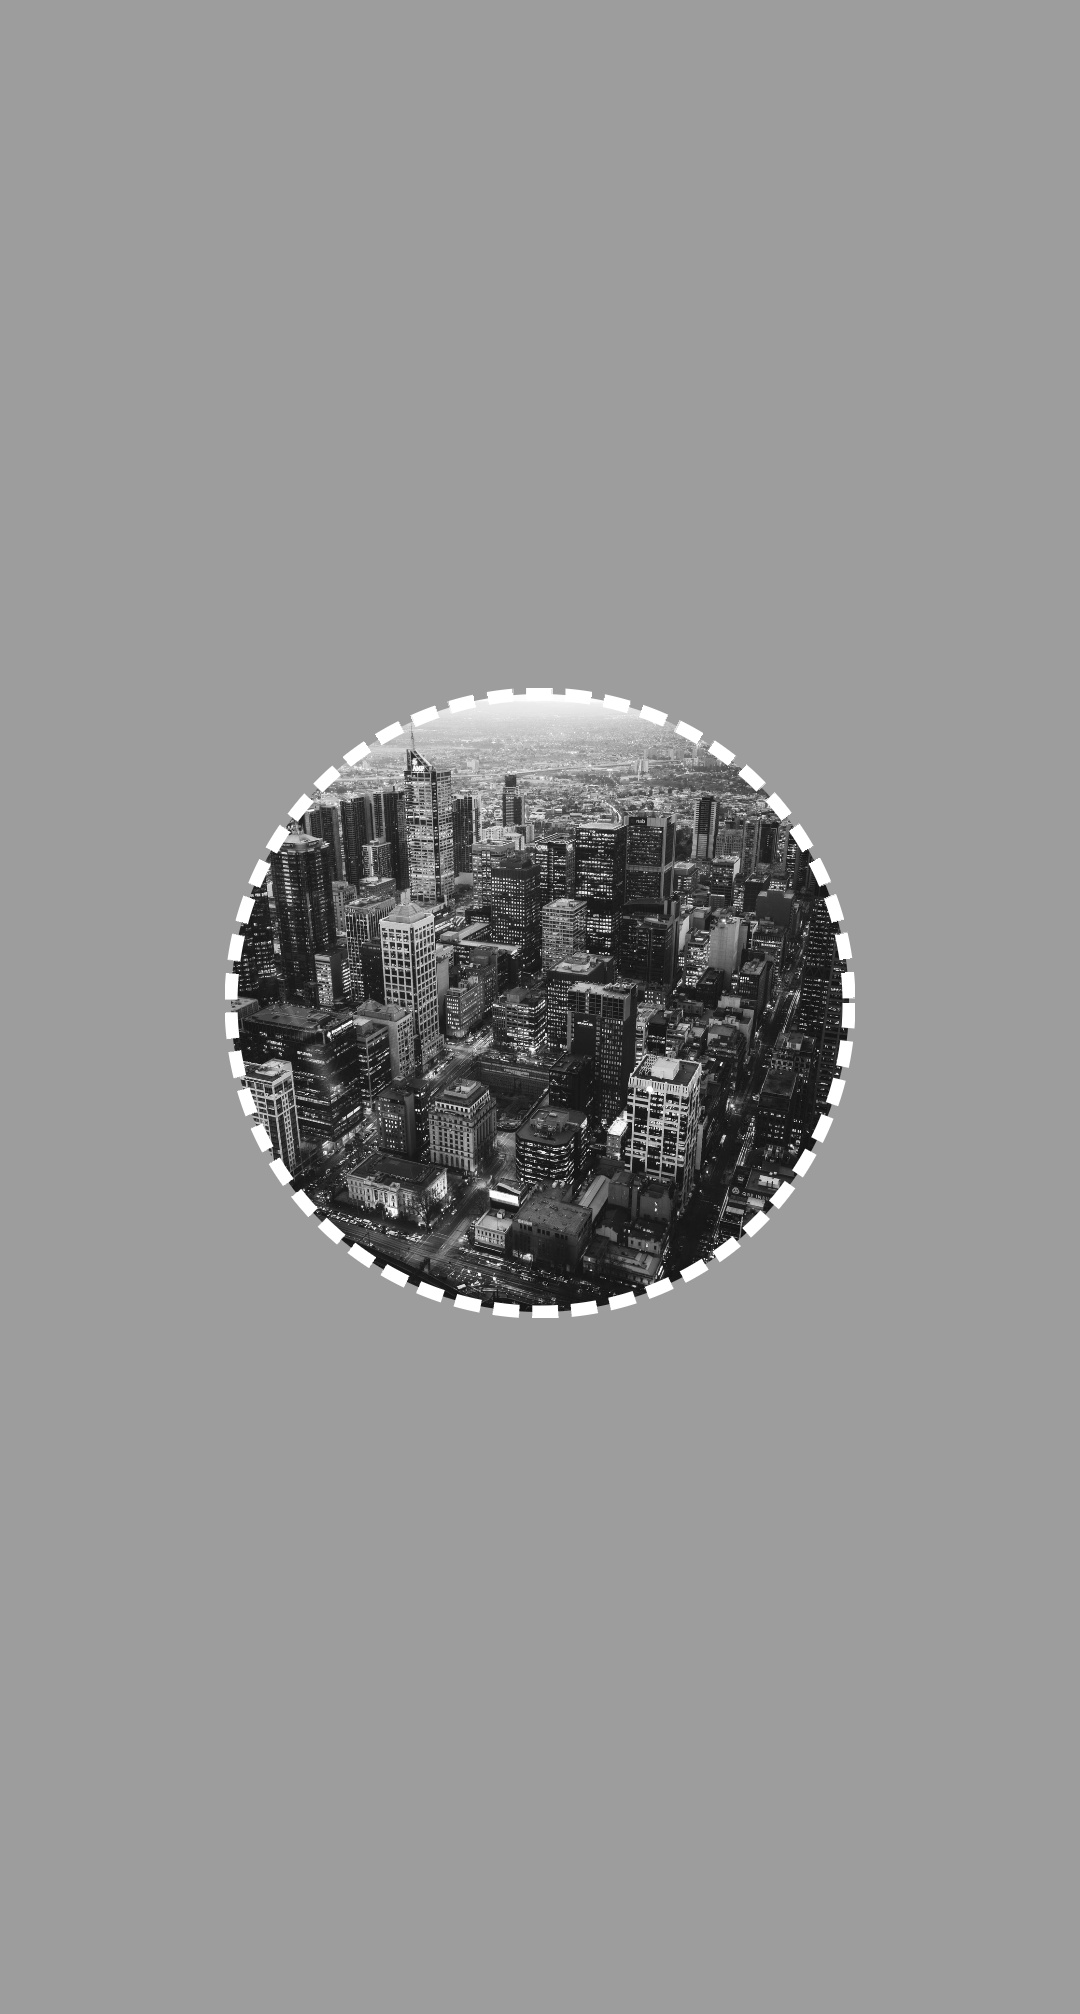
A border with the dashed effect
This is a whim of mine, sometimes the image is more special with a dotted line To do this, you just need to use these two attributes in combination with border_width and border_color.
app:border_dash_gap="4dp"
app:border_dash_width="10dp"
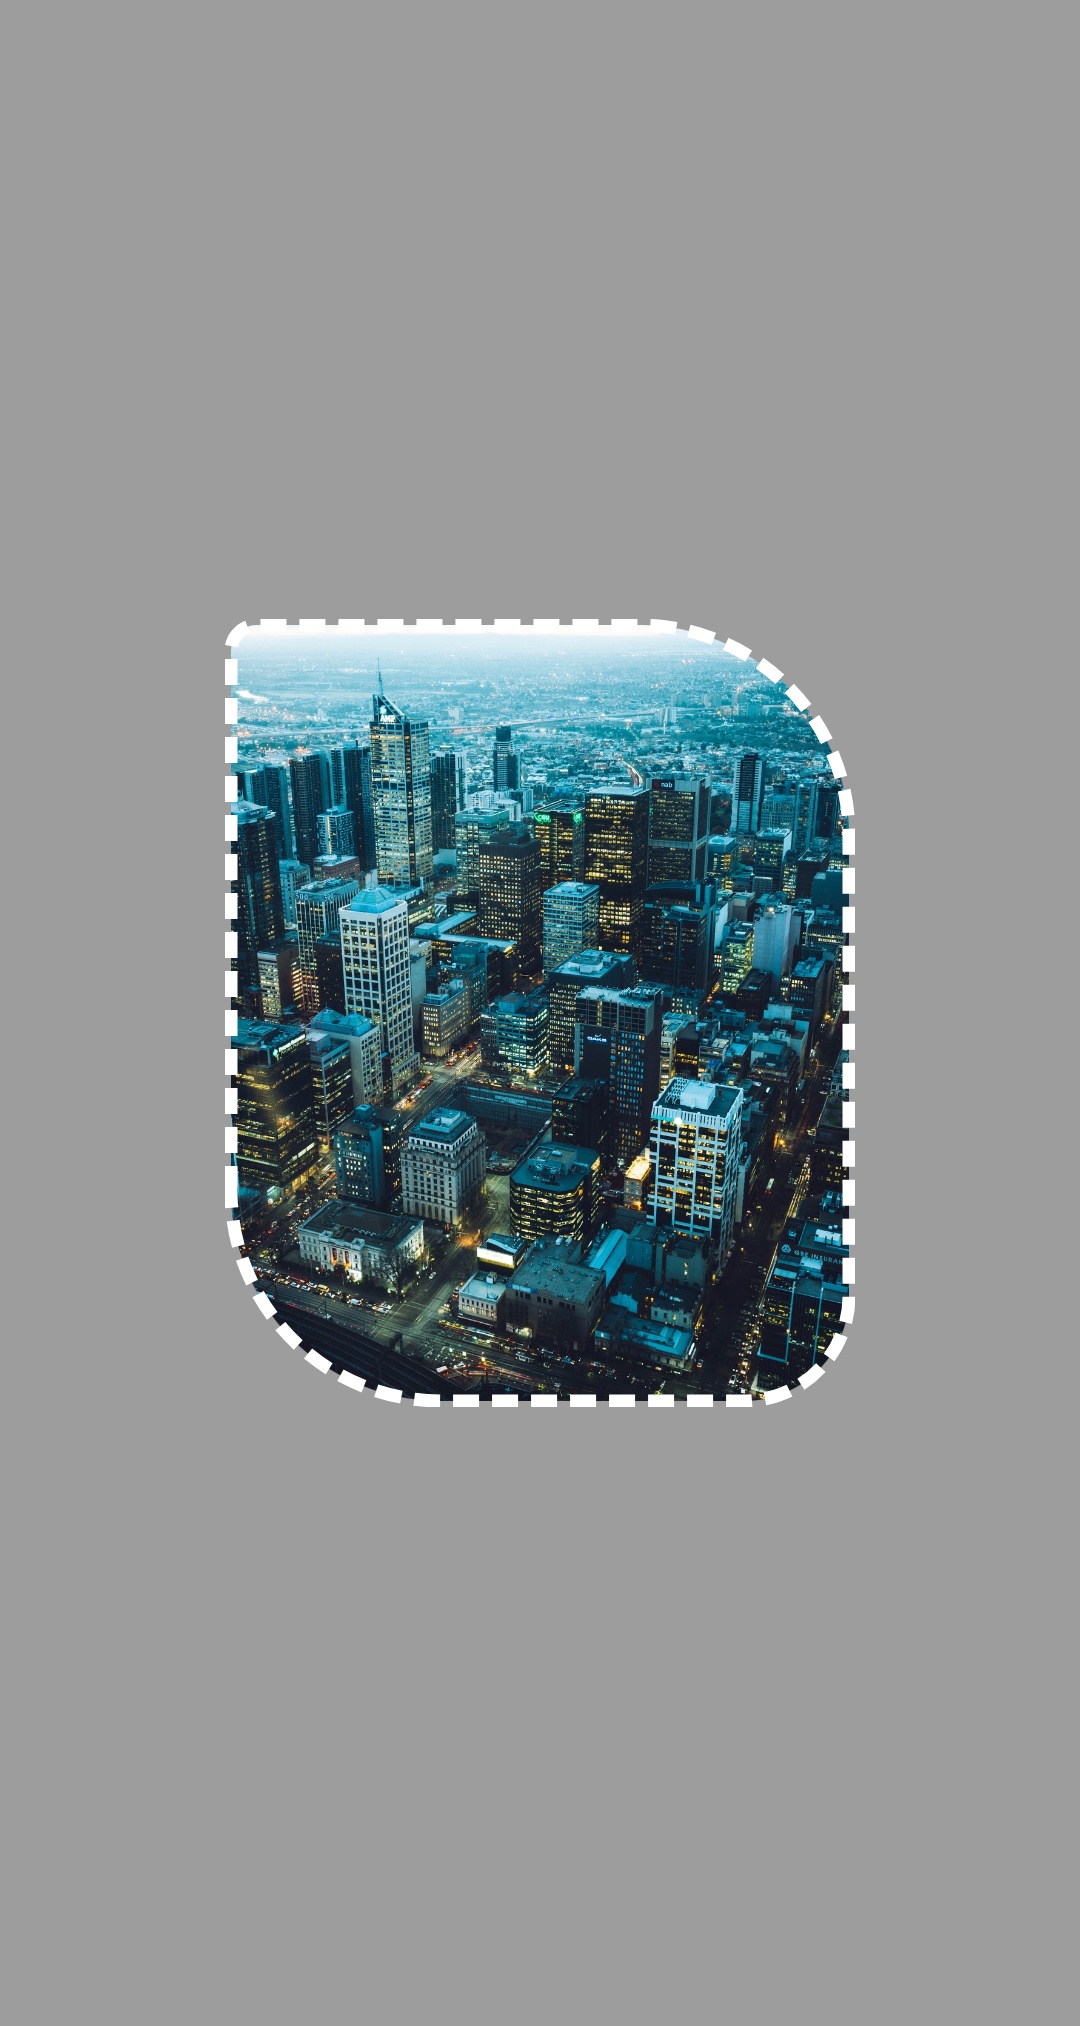
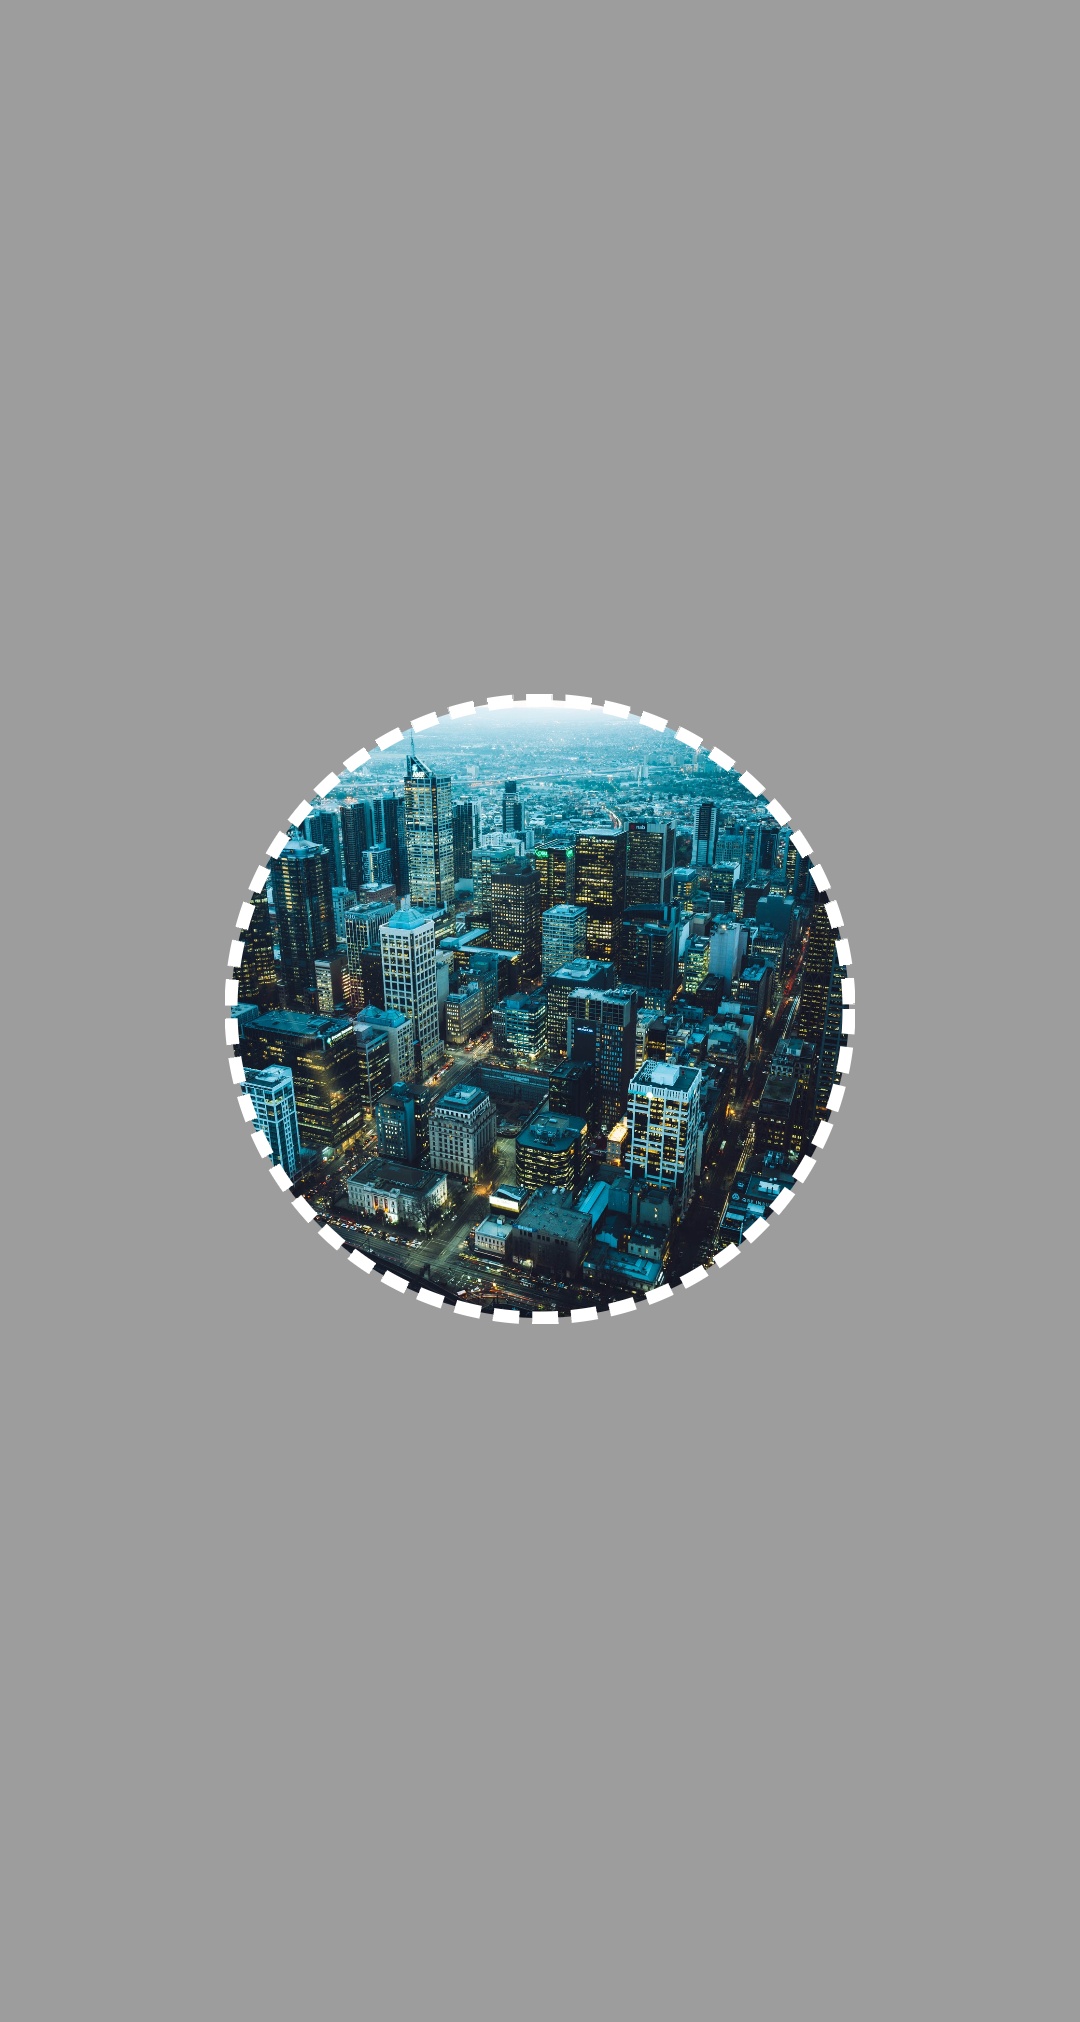
However, if dash_gap or dash_width are too large, it may cause an imbalance at the end of the border because there is not enough space left to break.
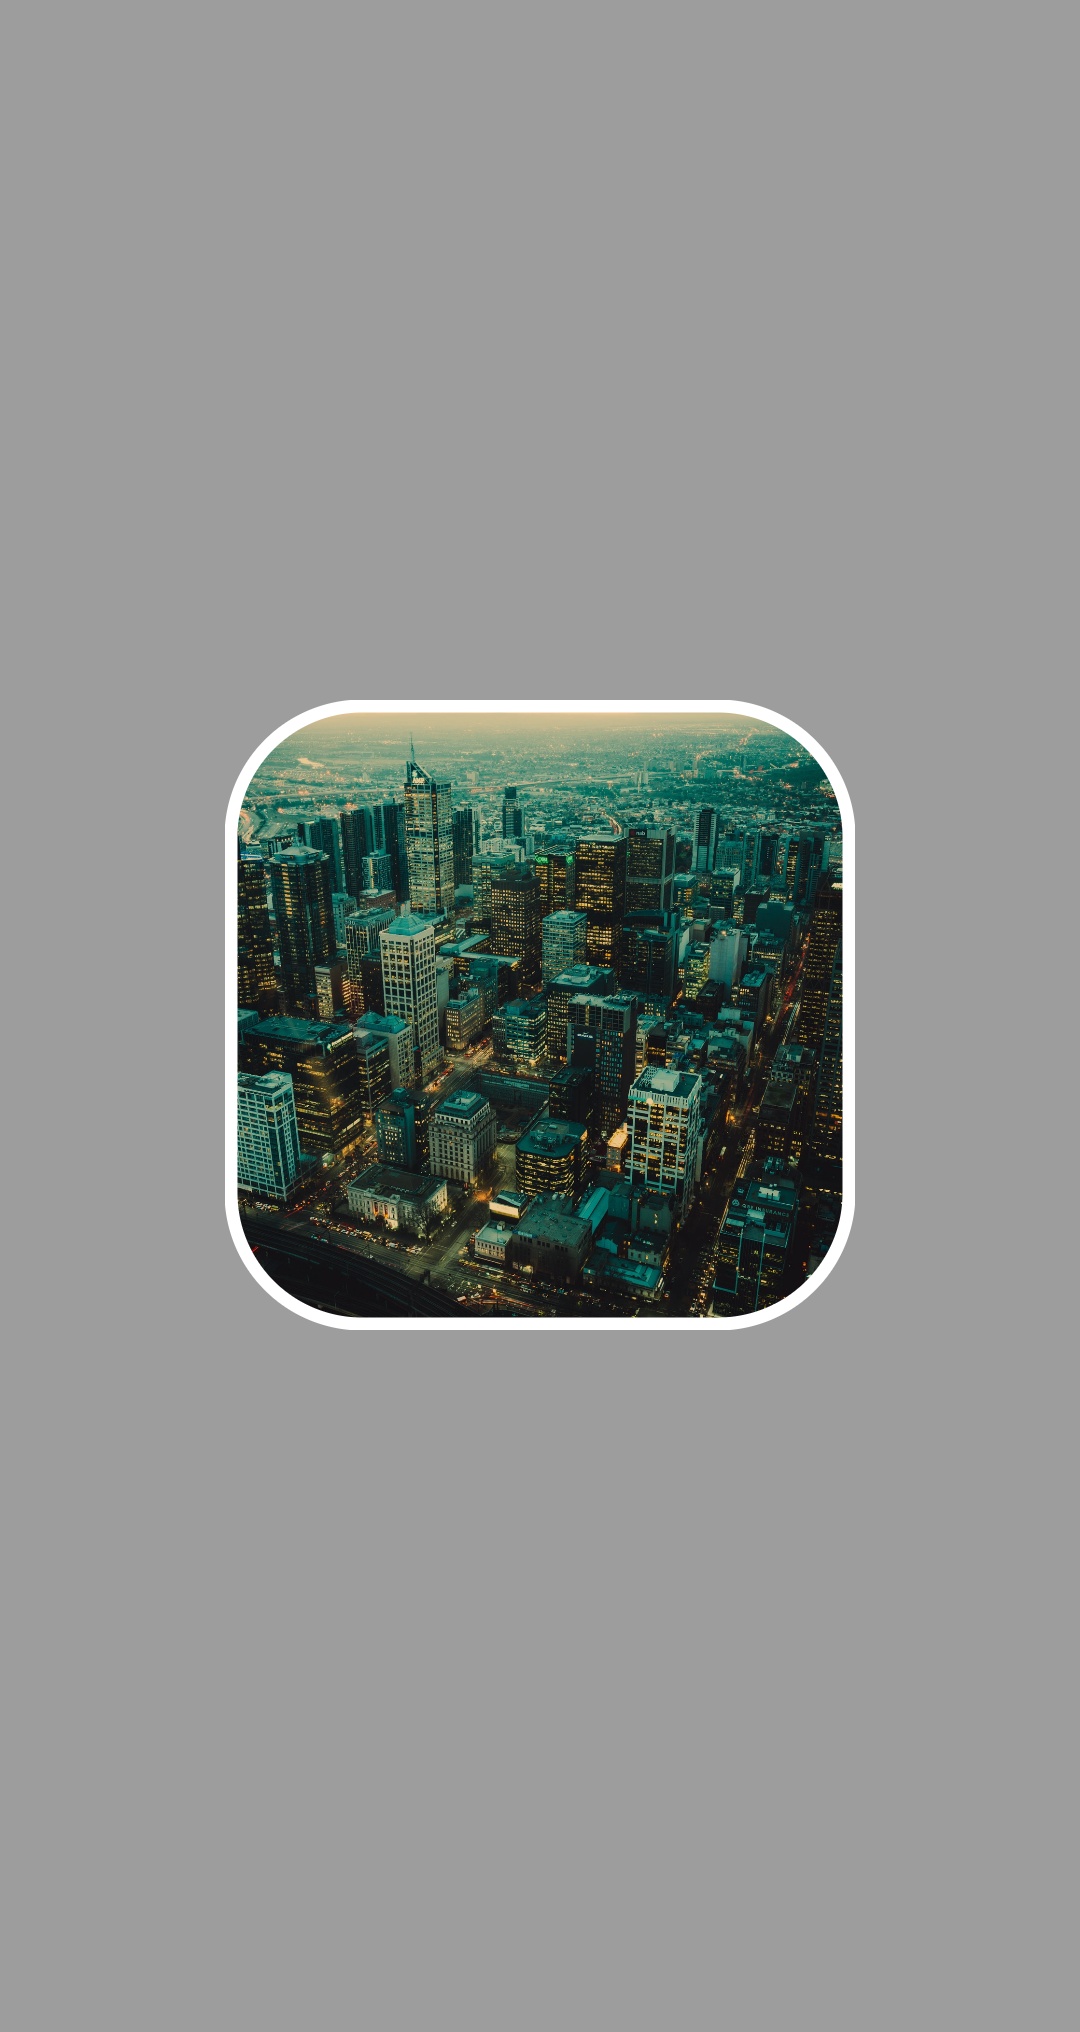
A filtered image view
This helps you create a classic image, very simple with just one boolean attribute:
app:gray_image="true"
Moreover, you can use any color to create a filter on the image. But remember, when gray_image has been set to true, all color_filter values have no effect
app:color_filter="#62A7DD"
Set value in code
For ease of use, you can also set all values in the corresponding code as follows:
image_view.borderDashWidth = 10.dp
image_view.borderDashGap = 5.dp
image_view.cornerRadius = 100.dp
image_view.cornerTopLeftRadius = 10.dp
image_view.cornerTopRightRadius = 20.dp
image_view.cornerBottomRightRadius = 30.dp
image_view.cornerBottomLeftRadius = 40.dp
image_view.borderWidth = 3.dp
image_view.borderColor = Color.RED
image_view.isGrayImage = true
image_view.filterColor = Color.parseColor("#64A4D6")
Here, notice the values written with “.dp” extension
Because these attributes are dimension values, so for an Int or Float value become a dp value, I’ve provided two extension functions to convert the Int or Float type to dp, you just need to call it as an extension function.
License
Copyright 2020 Man Ho

Licensed under the Apache License, Version 2.0 (the "License");
you may not use this file except in compliance with the License.
You may obtain a copy of the License at

    http://www.apache.org/licenses/LICENSE-2.0

Unless required by applicable law or agreed to in writing, software
distributed under the License is distributed on an "AS IS" BASIS,
WITHOUT WARRANTIES OR CONDITIONS OF ANY KIND, either express or implied.
See the License for the specific language governing permissions and
limitations under the License.